Custom HTML for Emails
Seamlessly integrate your brand into Passage with full HTML email templates.
Passage allows you to create your own customized emails to match your brand and build trust with your user base. Upload HTML directly into the Passage Console and use the template variables to build a delightful experience for login and verification emails.
This page provides step-by-step instructions for configuring your HTML templates in Passage.
Create a template
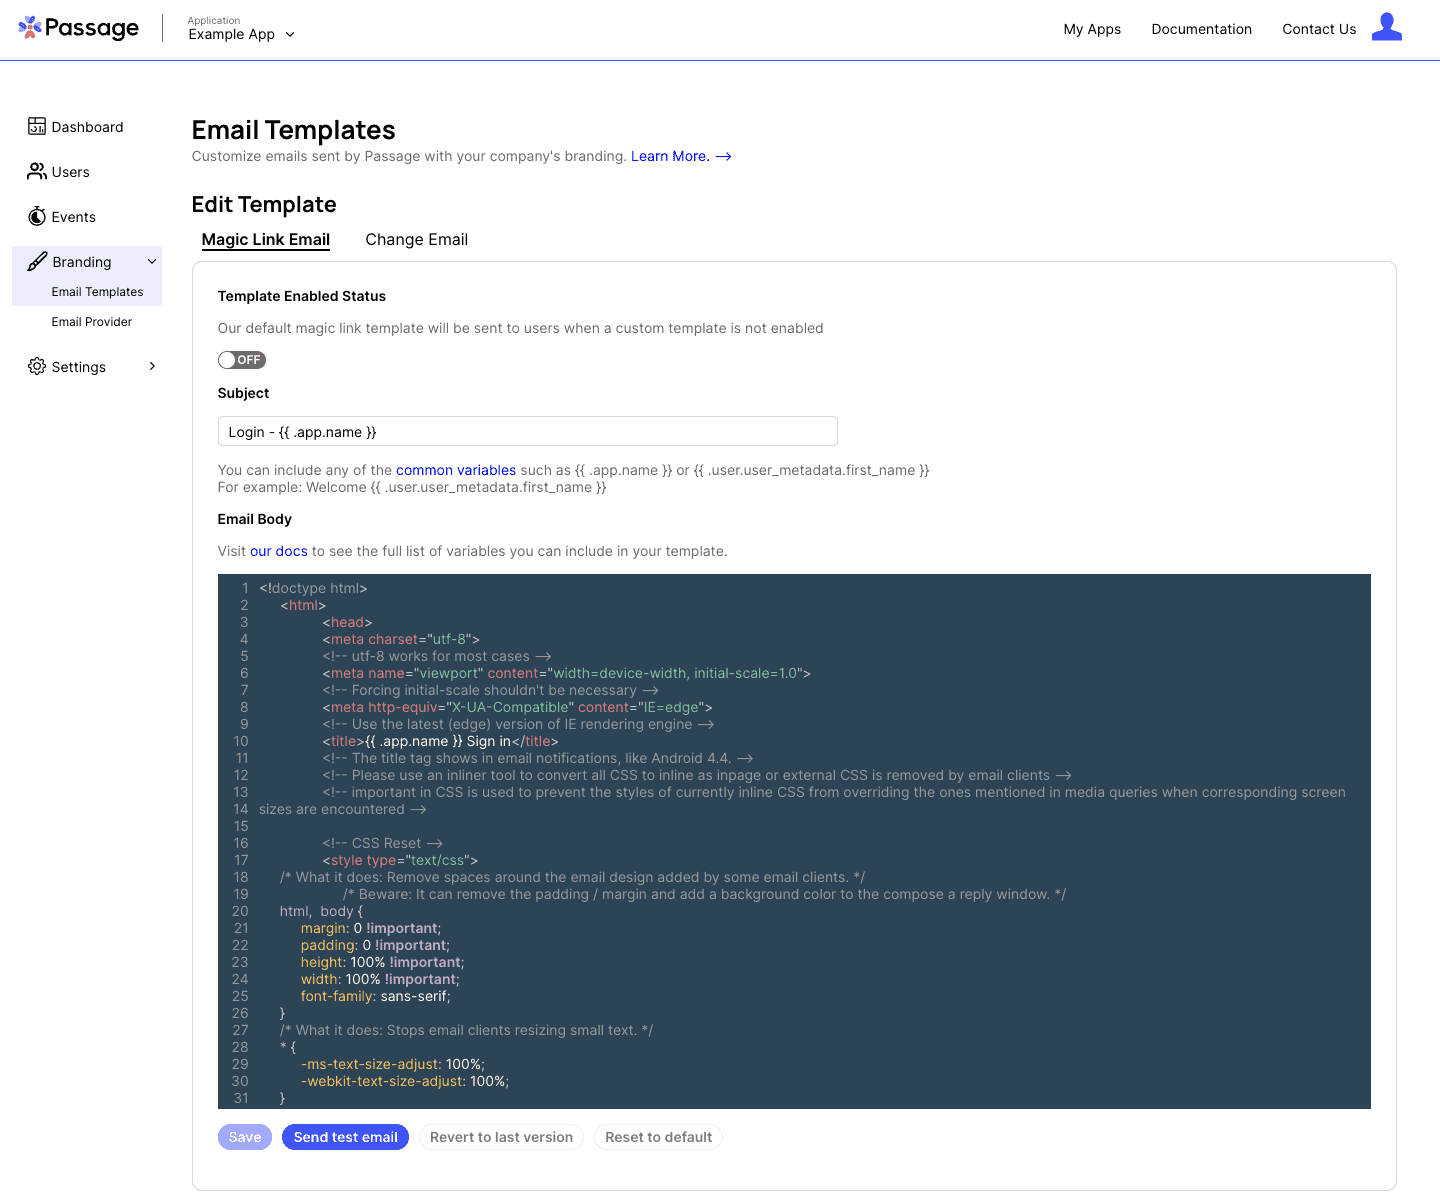
Email templates can be updated in the Branding section of the Passage Console.
For each email type, the subject and email body can be customized. Both the subject and email body have access to template variables that can be used to further customize your email.
Build and test your template
Once you have your subject and HTML saved we can go ahead and verify what users will receive. By clicking the Test Email button you will kick off an email with your new configuration to the email associated with your Passage Console user.
Note: Saving changes to your template or subject will not enable the custom template.
Enable your template
You will need to configure an email provider to enable custom email templates. Passage supports Sendgrid and AWS SES.
Once you’ve setup and tested your new email it’s time to let Passage know to send your custom option for this email type. You can do this by moving the Enabled toggle to On. Once toggled to “On” this template is live.
You are now sending custom emails!
Note: Enabling an email configuration is per email type - use the tab under Email Templates in the UI to switch email types.
Email templates
Passage supports only one template for each email type. The emails currently sent from Passage are:
Magic Link login
This email is sent whenever a user attempts to register or login with a Magic Link, or when they login on a new device for the first time. The full set of template variables that are available is listed below, but you must includes the {{.magic_link.url}} which is the link that enables the user to login.
Change email
This email is sent when a user initiates an email change from their profile. The full set of template variables that are available is listed below, but you must includes the {{.magic_link.url}} which is the link that enables the user to verify and complete their email change.