Quickstart: Hosted Login
Get started with passkeys using Passage by 1Password’s OIDC-compliant hosted login page.
The Passage hosted login page is an OIDC-compliant identity provider. Whenever a user needs to prove their identity, your applications redirect to the hosted login page and Passage will authenticate the user accordingly.
With hosted login, you don’t have to do any application-level changes to configure or update your authentication because all functionality is driven by the centralized authorization server. Your applications benefit from any improvements Passage makes in the login flow without the need for you to change your code.
The hosted login page can be used with any OIDC client library to quickly add passkey authentication to one or more applications. This also allows you to seamlessly integrate Passage into most common identity providers (AWS Cognito, Google Firebase, Microsoft Entra, and more) with minimal efforts.
Hosted user authentication with Passage
Here’s what is covered in this quick start guide:
- Create an app in the Passage Console
- Configure your OIDC client
- Set your Passage app redirect URL
- Done!
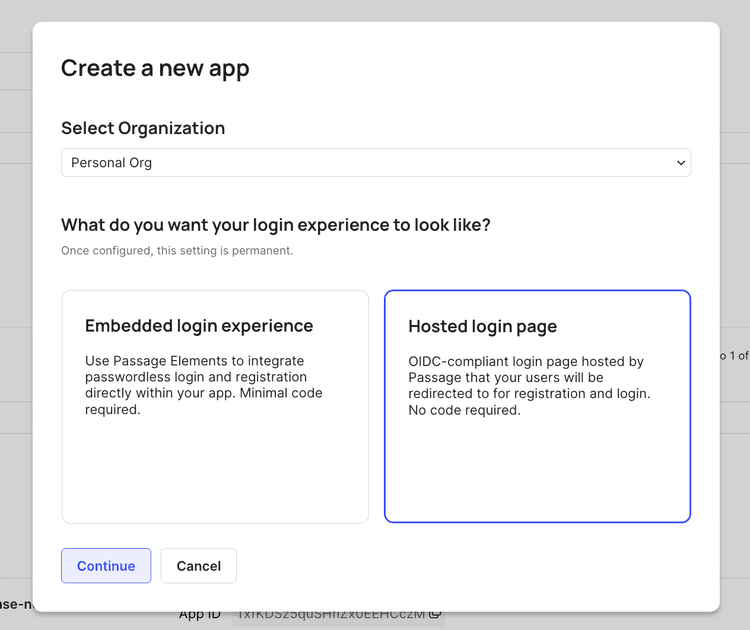
Create an app in the Passage Console
Login or create an account for the Passage Console. When you first sign up, you will be redirected to your homepage that includes an example application to explore. To create your first new application, select the “Create New App” button on the home page. Select the hosted login page login experience.
Give your application a name and then provide the following fields:
- Subdomain - the domain that Passage will use to host your login page. This value cannot be changed.
- Allowed Callback URL - the path you want to direct users to after successful login
For example, if you are building a local test app, your settings will probably look something like this:
- Subdomain -
my-passage-app.withpassage.com - Callback URL -
/dashboardor/
Configure your OIDC client
You will need to take several values from your Passage app and add them to your client app. From the Authentication Experience tab on the Authentication page in Passage Console, you will need your custom subdomain, client id, and client secret. You can learn more about these values in our OIDC Client Configuration Guide. The following values must be set in your client app to connect to Passage.
Set Passage as the Provider name.
Set the Client ID and Client secret.
Set the Authorized scopes
openid email phoneSet the Issuer URL as the Custom subdomain.
Set the OpenID Connect attributes for the User pool attributes you are supporting.
email = email
phone_number = phone
Set Passage app redirect URL
In the Authentication Experience tab on the Authentication page in Passage Console, you need to define the Allowed callback URLS. You will need to obtain the calback URL from your OIDC client. Be sure to add a URL for each of your dev environments; the input accepts comma separated lists. Below is an example of a Cognito callback URL.
https://passage-oidc.auth.us-east-2.amazoncognito.com/api/auth/callback/cognito, http://localhost:3000/api/auth/callback/cognitoWhat’s next?
Once you have your application set up, you can:
- Explore the Passage Console dashboard to view users and add team members
- Learn more about Hosted login
- Learn how to configure your OIDC client