Auth0
Add Passage as an OAuth2.0 Provider to your Auth0 Login
Prerequisites
- A Passage app. Follow the Hosted Quickstart instructions when creating a Passage app.
- Optional: Learn more about creating Custom Social Connections in Auth0
Configuration
Passage works as an identity provider for Auth0. Passage will be used to authenticate and authorize users from the Auth0 user directory.
Auth0
- Application Login URI
- In some scenarios Passage will need to redirect to your application’s login page. This URI needs to point to a route in your application that redirects to your
/authorizeendpoint .
- In some scenarios Passage will need to redirect to your application’s login page. This URI needs to point to a route in your application that redirects to your
- Allowed Logout URLs
- A set of URLs that are valid redirect locations after a successful Passage logout.
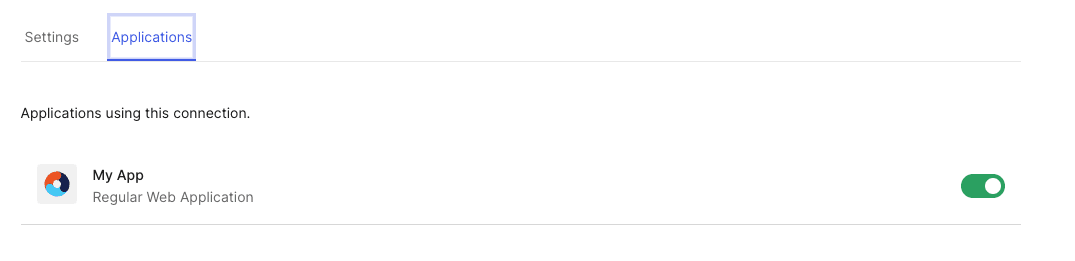
To enable Passage as the provider to your Auth0 application, flip the custom connection to the “Applications” tab and follow the steps below.
You will need to take several values from your Passage app and add them to your Auth0 app. From your Passage app’s settings in the Passage console, you will need your userInfo URL, authorization URL, token URL, and client id. Learn more in the Hosted configuration guide.
Set the Authorization URL and Token URL.
Set the Authorized scopes. Currently, the scopes supported by Passage are:
openid email phoneSet the Client ID.
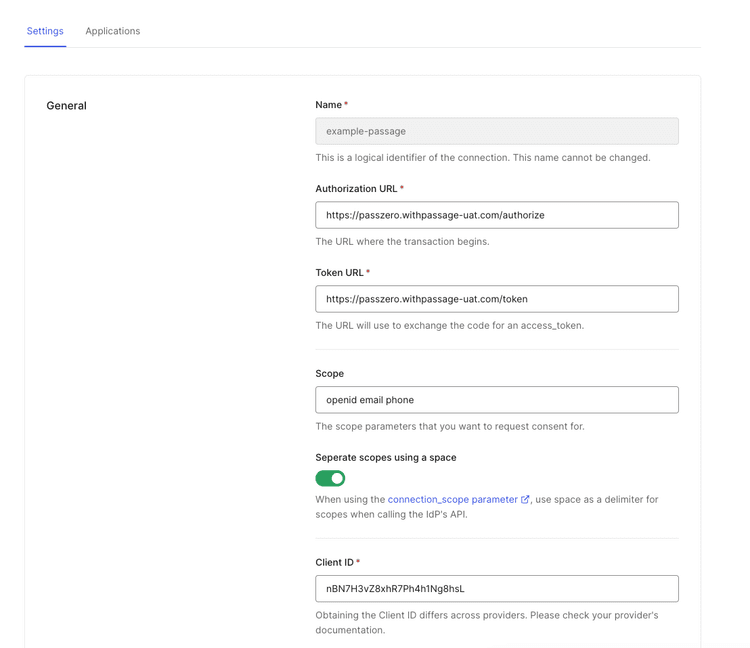 Auth0 settings in console
Copy your UserInfo URL from the the Authentication Experience tab on the Authentication page in Passage Console and use it in the code snippet below - add this snippet in the “Fetch User Profile Script” section
Add the following code snippet to the “Fetch User Profile Script” section.
Change the {USERINFO_URL_HERE} to your UserInfo URL.
function fetchUserProfile(accessToken, context, callback) {
request.get(
{
// Set userInfo URL here
url: { USERINFO_URL_HERE },
headers: {
Authorization: 'Bearer ' + accessToken,
},
},
(err, resp, body) => {
if (err) {
return callback(err);
}
if (resp.statusCode !== 200) {
return callback(new Error(body));
}
let bodyParsed;
try {
bodyParsed = JSON.parse(body);
} catch (jsonError) {
return callback(new Error(body));
}
const profile = {
user_id: `${bodyParsed.sub}`,
email: `${bodyParsed.email}`,
email_verified: `${bodyParsed.email_verified}`,
phone: `${bodyParsed.phone_number}`,
phone_verified: `${bodyParsed.phone_number_verified}`,
};
callback(null, profile);
},
);
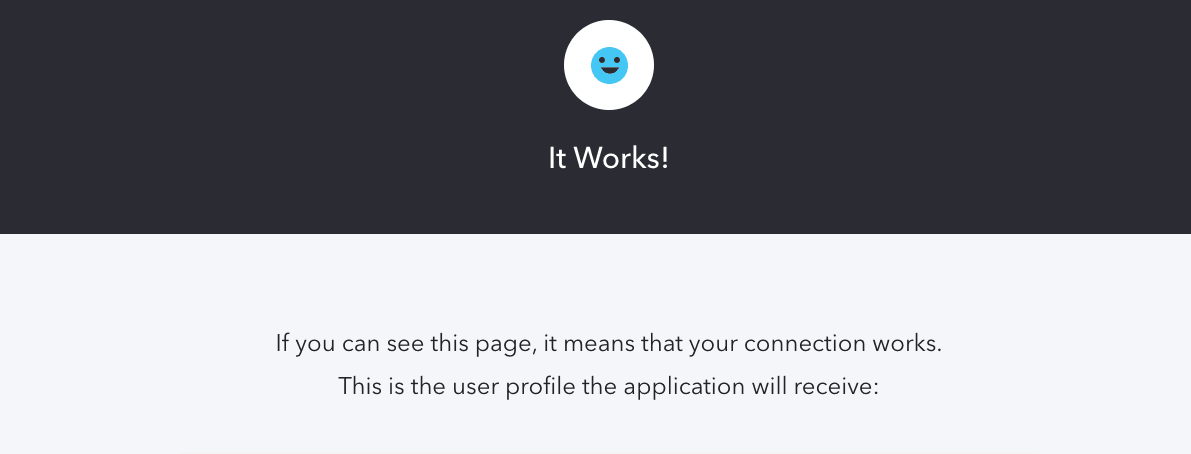
}Click “Test Connection”
A successful connection will show a screen similar to below. :tada:
Passage Callback URL
Now that you have configured Auth0, users will be directed to the Passage hosted login page for authentication. The final step, is setting the callback URL in your Auth0 app to redirect users back to the correct URL when Passage authentication is complete.
In the Authentication Experience tab on the Authentication page, you need to define the Allowed callback URLS. For Auth0, the callback URL will be the following url. The Auth0 domain can be found in your Auth0 application page.
https://{yourAuth0Domain}/login/callback