Cognito Configuration
Prerequisites
- A Passage app. Follow the Hosted Login Quickstart instructions when creating a Passage app.
- An AWS account.
- An AWS Cognito user pool.
Cognito federated identity
To add Passage as an OIDC provider, you will create a Amazon Cognito Federated Identity. A federated identity in Amazon Cognito enables you to manage users and permissions across applications. For more information about federated identities visit Amazon’s documentation here.
You will need to take several values from your Passage app and add them to your federated identity provider. From the Authentication Experience tab on the Authentication page in Passage Console, you will need your custom subdomain, client id, and client secret. Learn more in the Hosted Login configuration guide.
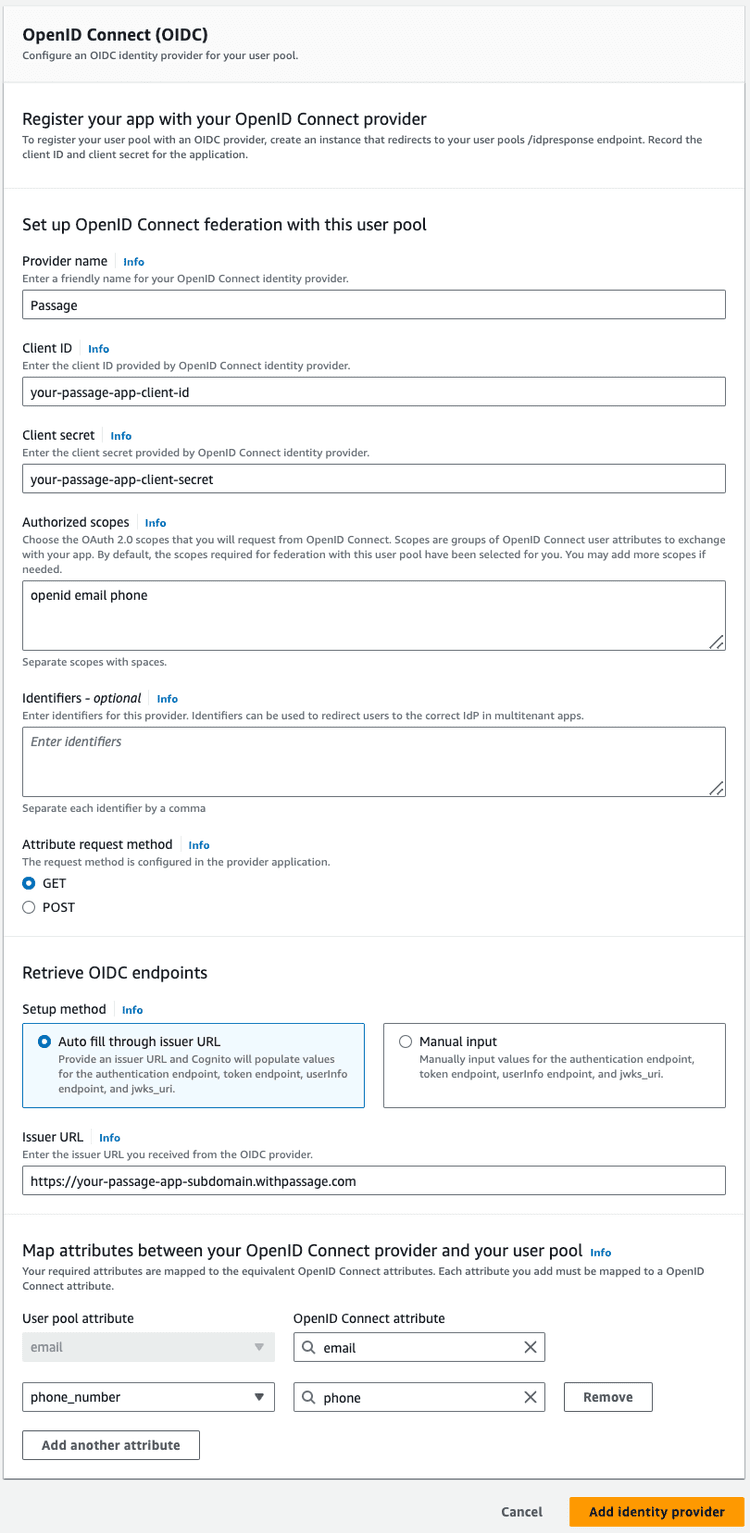
Set Passage as the Provider name.
Set the Client ID and Client secret.
Set the Authorized scopes. Currently, the scopes supported by Passage are:
openid email phoneSet the Issuer URL as the Custom subdomain.
Set the OpenID Connect attributes mapping for the user pool attributes you are supporting. For example, you might set something like this:
email = email
phone_number = phone
 Amazon Cognito add identity provider page
Passage callback URL
Now that you have configured Cognito, users will be directed to the Passage hosted login page for authentication. The final step, is setting the callback URL in your Passage app to redirect users back to the correct URL when Passage authentication is complete.
In the Authentication Experience tab on the Authentication page, you need to define the Allowed callback URLS. For Cognito, the callback URL will be
{{YOUR_COGNITO_DOMAIN}}/oauth2/idpresponseYou can find your domain here:

Be sure to add a URL for each of your dev environments; the input accepts comma separated lists.
https://passage-oidc.auth.us-east-2.amazoncognito.com/oauth2/idpresponse
http://localhost:3000/oauth2/idpresponse