Add Passage
Add Passage to your Android project
Prerequisites
- A recent version of Android Studio
- Make sure that your project meets these requirements:
- Targets API level 33 or higher
- Uses Android 13 or higher
- A Passage account
- A Passage app
- A device or emulator that meets passkey requirements (if your app uses passkeys)
If you don’t already have an Android project and just want to try out Passage, you can clone our Android Example App.
Add the Passage SDK
In your module (app-level) Gradle file (usually <project>/<app-module>/build.gradle), add the Passage dependency like this, and then sync your Android project with Gradle files:
dependencies {
 // ...
 implementation 'id.passage.android:passage:1.8.2'
}
Declare an instance of Passage.
lateinit var passage: PassageIn your Activity’s onCreate() or Fragment’s onViewCreated method, initialize the Passage instance.
passage = Passage(requireActivity(), "YOUR_APP_ID")If you are NOT using passkeys, that’s it - you’re ready to start using Passage!
If you ARE using passkeys, follow the below instructions
Configure app for passkeys
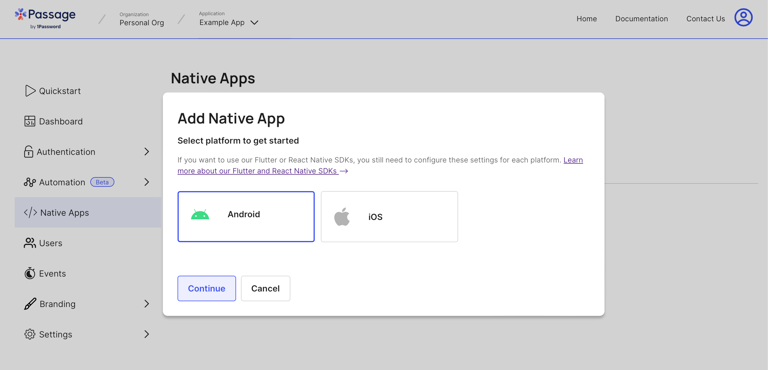
Add your Android app in Passage Console
In the Passage Console, navigate to “Native Apps” and add your Android app. You’ll need your app’s package name and signing certificate fingerprint.
Generate signing certificate fingerprint
To get your signing certificate fingerprint, copy and paste this code in your terminal, replacing the placeholder all caps values:
keytool -list -v -keystore PATH_TO_KEYSTORE -alias KEYSTORE_ALIAS -storepass STORE_PASSWORD -keypass KEY_PASSWORDNeed help with finding or using your certificate? Learn more here.
 Adding an Android app in Passage Console
Publish Digital Asset Links file
If your Passage App is using Hosted Login, we automatically handle this for you. You can skip to Step 3.
Google’s Digital Asset Links protocol enables an app or website to make public, verifiable statements about other apps or websites. Your website must declare that it is associated with your specific Android app, and declare that it wants to share user credentials in order for passkey authentication to work.
Get asset links JSON file
Click the menu button on your Native App in Passage Console to download your assetlinks.json file.
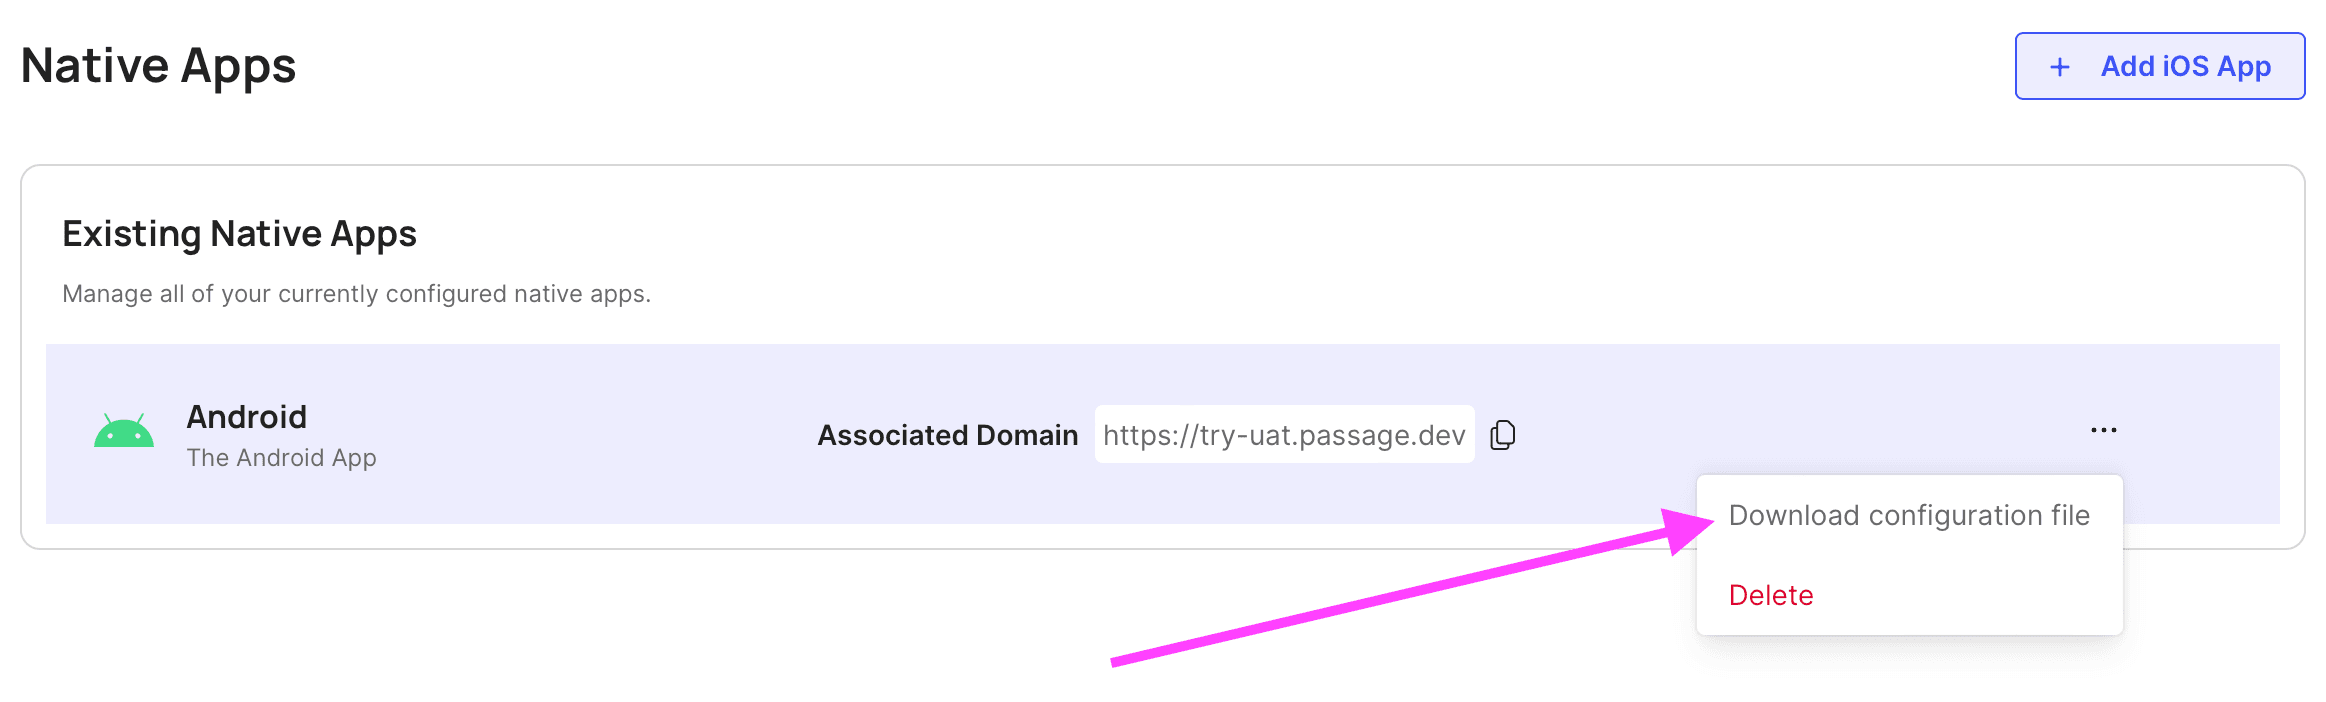 Click "Download configuration file" to get your assetlinks.json file.
Publish asset links JSON file
Publish this file to your site’s .well-known/ directory. Note that your Passage app’s authentication origin must match the domain where this file is hosted.
Configure asset statements
In “Native Apps” in Passage Console, you can get your app’s associated domain. Use this value (minus the “https://”) instead of YOUR_AUTH_ORIGIN in the next step below.
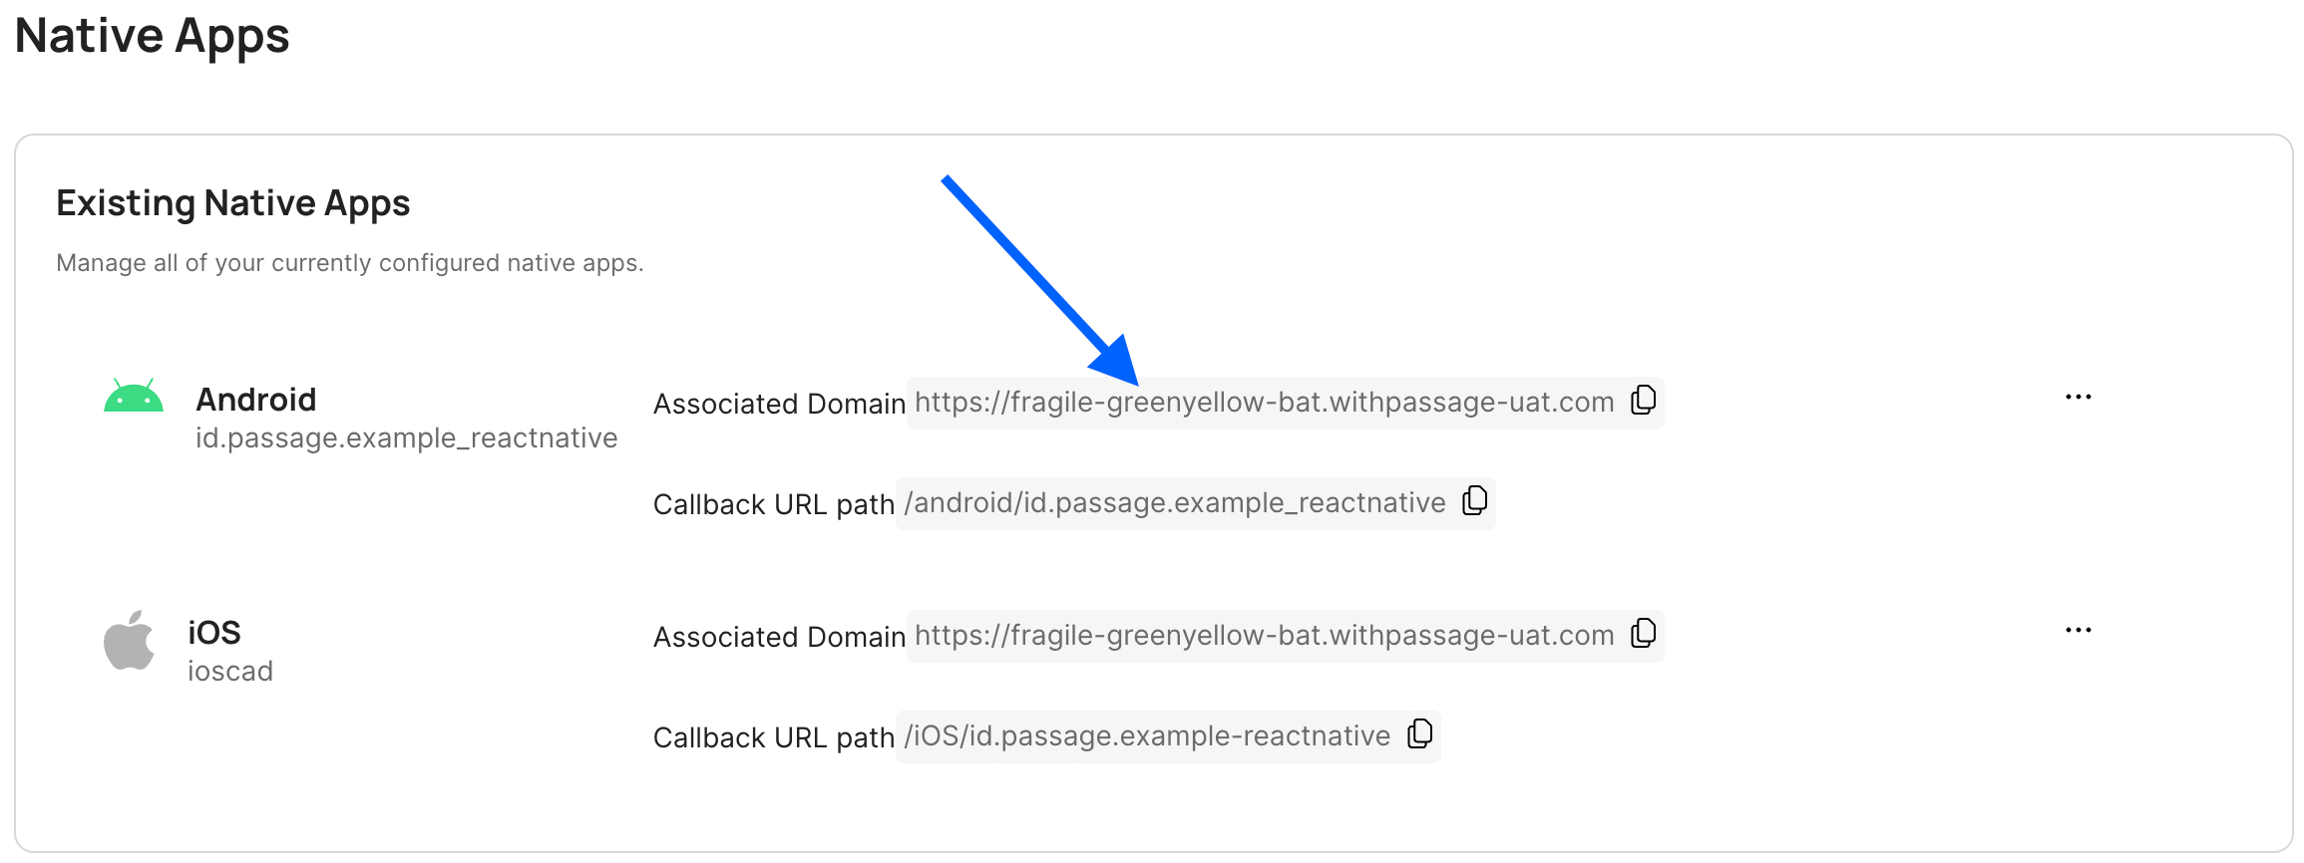 Copy the Associated Domain value in Console
<resources>
    //..

    <!-- Required Passage app settings -->
    <string name="passage_auth_origin">YOUR_AUTH_ORIGIN</string>
    <string name="asset_statements">
      [{
        \\"include\\": \\"https://@string/passage_auth_origin/.well-known/assetlinks.json\\"
      }]
    </string>

</resources>
Finally, paste the following meta-data into your app’s AndroidManifest.xml:
<manifest ...>
    <application ...>

        <meta-data
          android:name="asset_statements"
          android:resource="@string/asset_statements" />

    </application>
</manifest>
App Linking (Required for Magic Link and Hosted Login)
If your app uses Magic Links or Hosted Login, you’ll likely want to setup your app with App Linking. This will direct users that click on an App Link in their email or messaging app on their Android device to your app, rather than to a browser.
In your app’s AndroidManifest.xml file, add this intent filter to your <activity> to enable App Linking:
//..
<activity
android:name=".MainActivity"
android:exported="true"
android:launchMode="singleInstance">
//..
<intent-filter android:autoVerify="true">
<action android:name="android.intent.action.VIEW" />
<category android:name="android.intent.category.DEFAULT" />
<category android:name="android.intent.category.BROWSABLE" />
<data android:scheme="http" />
<data android:scheme="https" />
<data android:host="@string/passage_auth_origin" />
// Required Line for Only Hosted Authentication
<data android:pathPrefix="/android/"YOUR_PACKAGE_NAME"/>
</intent-filter>
</activity>
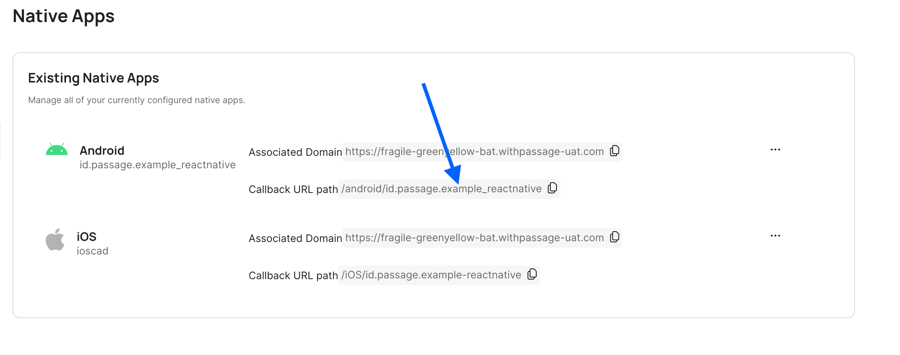
//..If you’re using Hosted Login, you can find the value for android:pathPrefix in the Native Apps section of the console.