Add Passage
Add Passage to your Swift project
Prerequisites
- A recent version of Xcode
- Minimum OS version support: iOS 14, macOS 12, tvOS 14, watchOS 7, or visionOS 1
- A Passage app.
If you don’t already have a Swift project and just want to try out Passage, you can clone our iOS Example App.
Add Passage SDK to your Swift app
Install
You can easily install Passage Swift through Swift Package Manager or Cocoapods.
To install via Swift Package Manager, simply enter this url Xcode’s Swift Package Manager’s search bar:
https://github.com/passageidentity/passage-swiftIf your app uses Cocoapods instead, add this dependency to your Podfile:
pod 'PassageSwift'Usage
Import Passage and delcare an instance, like this:
import Passage

let passage = Passage(appId: "YOUR_APP_ID")
If you are NOT using passkeys or Hosted Login, that’s it - you’re ready to start using Passage!
If you ARE using passkeys or Hosted Login, follow the below instructions.
Configure app for passkeys
Add your Swift app in Passage Console
In the Passage Console, navigate to “Native Apps” and add your Swift app. You’ll need your app’s bundle identifier and Apple Developer Team ID.
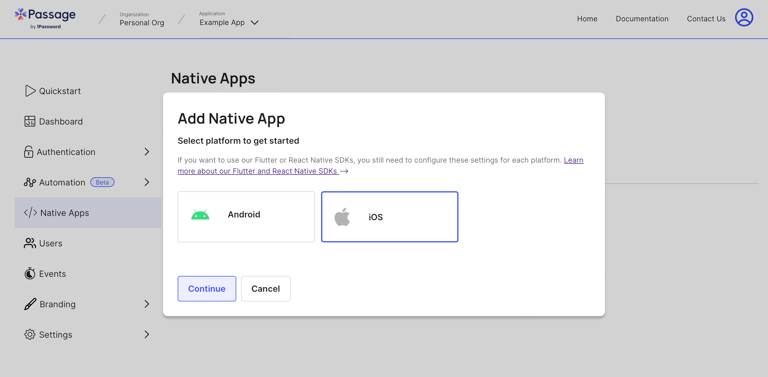 Adding an iOS app in Passage Console
Publish Associated Domains file
Apple uses Associated Domains to establish a secure association between your domain and your app so you can securely authenticate your users with passkeys. You’ll need to create and serve the associated domains file in order to use passkeys or Magic Links in your app.
If your Passage App is using Hosted Login, we automatically handle this for you. You can skip to Step 3.
Get associated domains file
Click the menu button on your Native App in Passage Console to download your apple-app-site-association file.
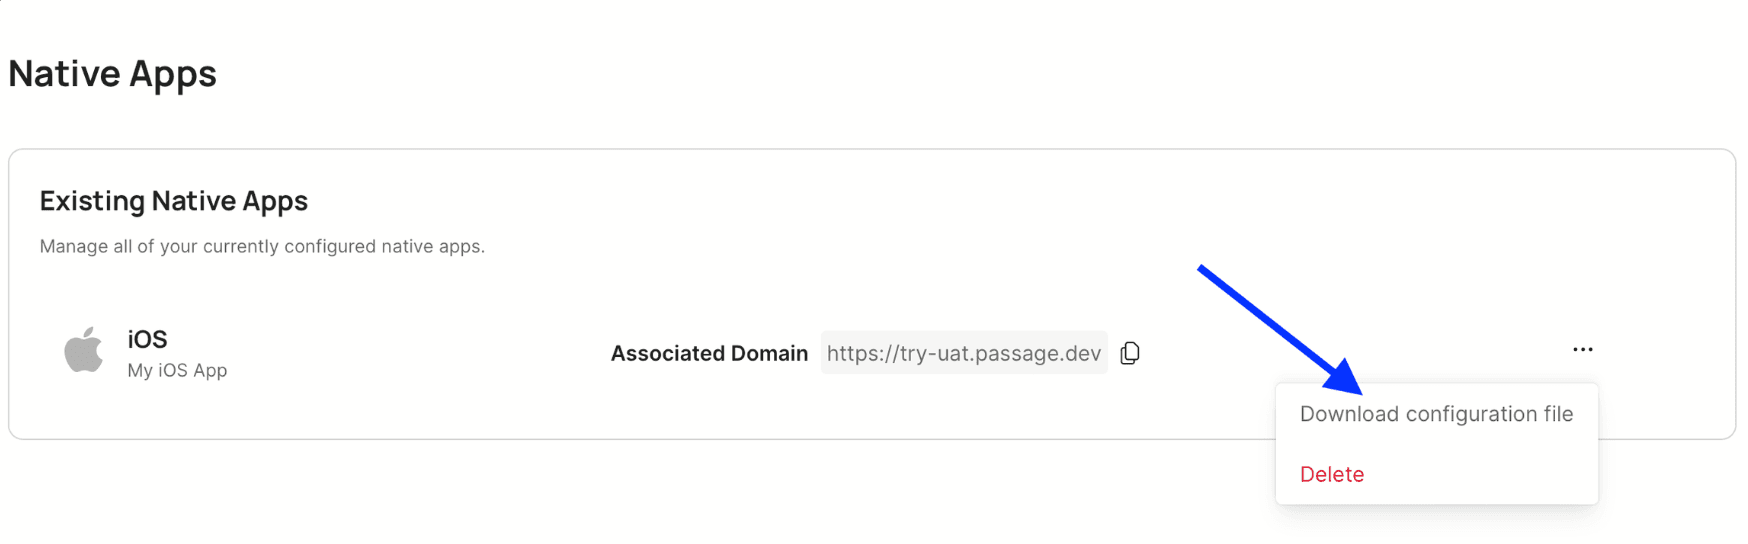 Click "Download configuration file" to get your associated domains file.
Publish associated domains file
Serve this file from your site’s .well-known/ directory. Note that your Passage app’s authentication origin must match the domain where this file is hosted.
Add Associated Domains entitlements to your app
The next step is to enable the appropriate entitlements for your project in Xcode. These entitlements will associate your Swift app with your domain and use the apple-app-site-association file to verify this association.
Get your app’s associated domain
In “Native Apps” in Passage Console, you can get your app’s associated domain. Use this value (minus the “https://”) instead of YOUR_DOMAIN in the next step below.
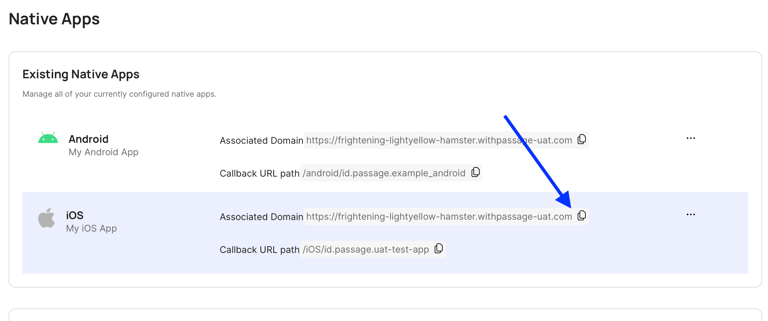
Copy the Associated Domain value in Console.
To add the capability and entitlements to your application:
- Open the target’s “Signing & Capabilities” tab in Xcode and add Associate Domains capability.
- Click Add(+) at the bottom of the Associate Domains section.
- Add
webcredentials:YOUR_DOMAINlike in the screenshot below. Addapplinks:YOUR_DOMAINif your app uses Hosted Login or Magic Links.
 Add your associated domains entitlements.